You all may know this short row technique, but I’ve decided to upload my own tutorial on this skill because I often use it in my patterns and it will help you compare it with Japanese Wrap and Turn I posted about in the past.
For those who haven’t heard about it, hope this helps!
Short rows are used to create a slope (shoulders, back neck, etc.) and as the name indicates, you stop working in the middle of a row. The work should be turned, and you are going to work back the row, leaving a few stitches unworked at the end of the row.
RIGHT SIDE TO WRONG SIDE
Here, I have knit the row until 4 stitches remain at the left end of my work.
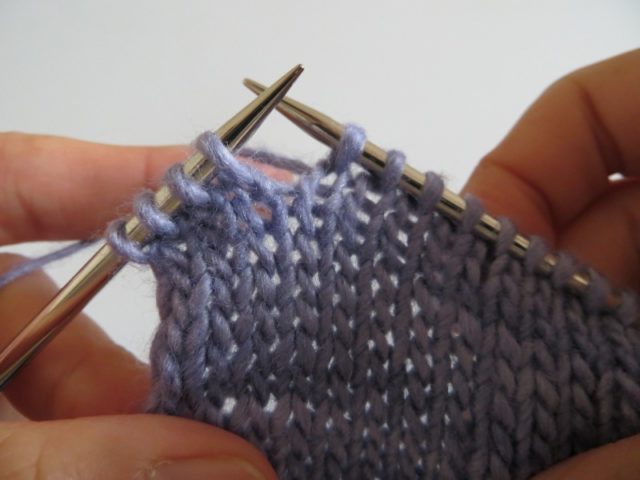
Then, with your working yarn in the back, slip the next stitch purlwise (insert your right needle into the stitch from the right, as if to purl).
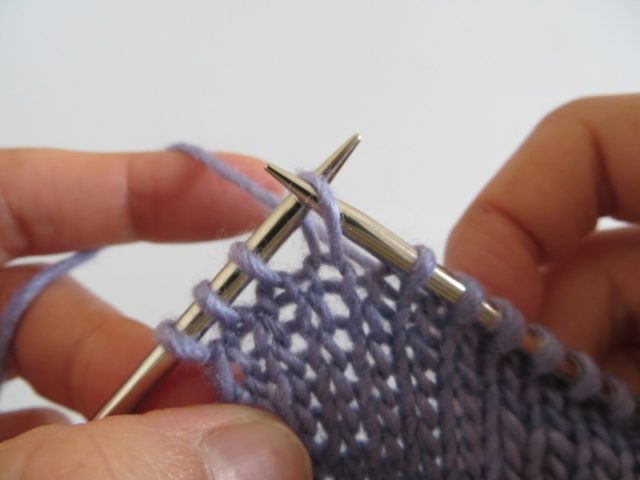
Bring your working yarn to the front.
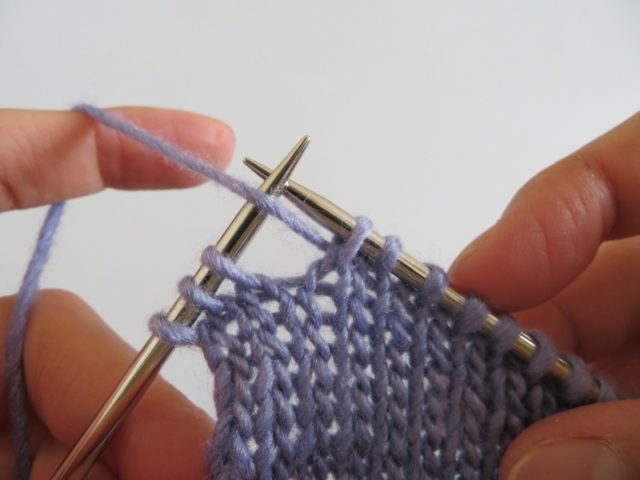
Replace the slipped stitch onto your left needle
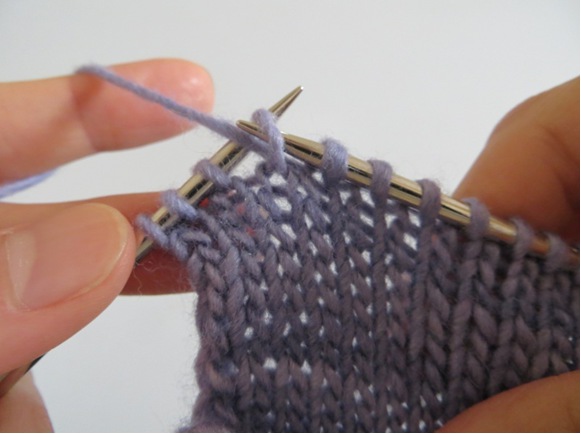
Then, turn your work.
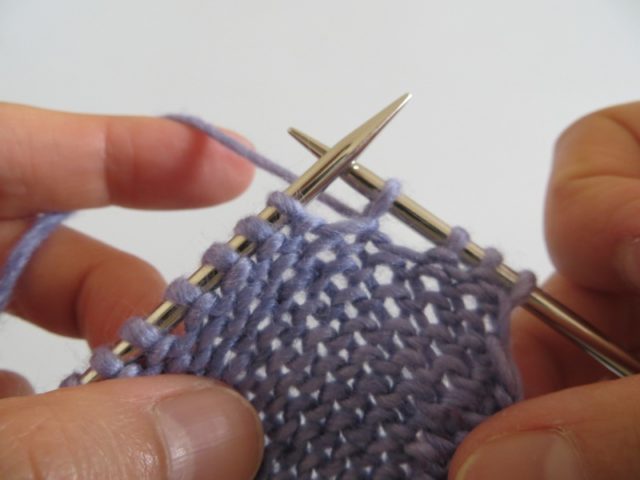
You can see the yarn begins to wrap the stitch. To complete wrapping, you just have to work the next stitch. As the working yarn is now in the back of the work, bring your working yarn to the front of work and purl the row normally.
You have 2 fewer rows at the left end of your work. And repeating this steps (knit until 4 stitches remain before the wrapped stitch, turn work), you will have a sort of stairsteps – charted below with white cells. The grey cells represent wraps, but they actually wrap the stitches below the wraps.
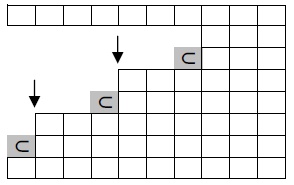
To transform this steps into a slope, we should “resolve” the gaps between the steps.
Knit to the stitch just before the wrapped stitch (usually indicated as “k(nit) to wrapped st(itch)”).
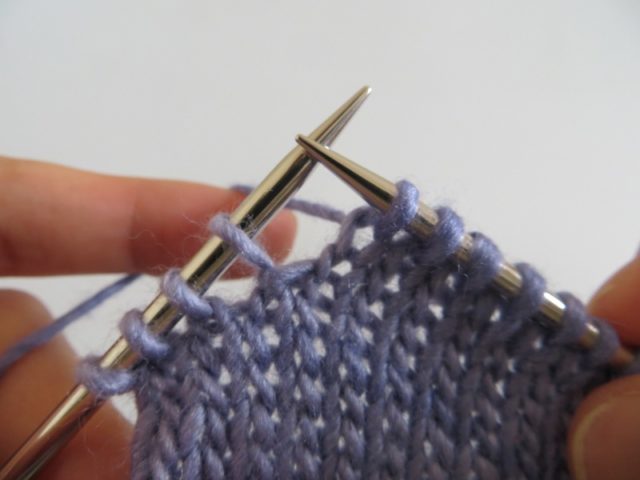
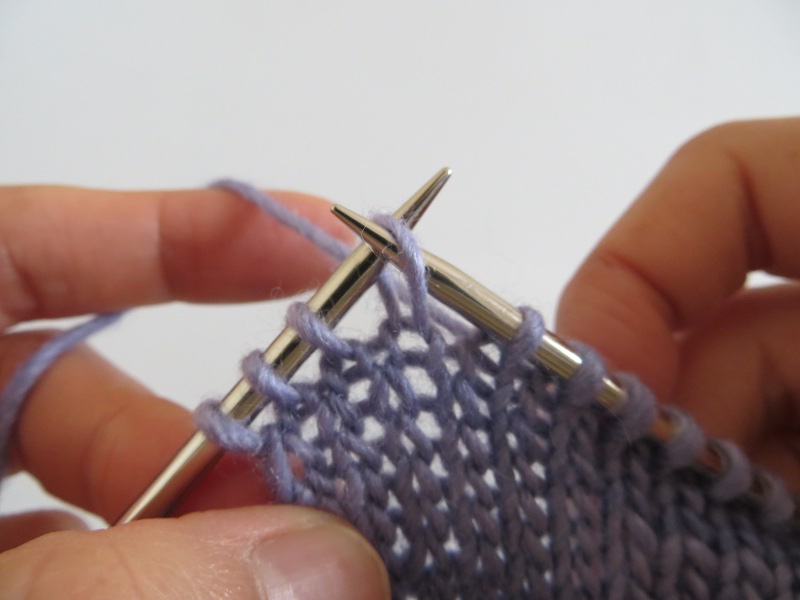
Then, we gonna “pick up the wrap” and knit it with the stitch, in one movement, though this step is broken up into 3 photos.
Insert your right needle into the wrap, from the bottom,
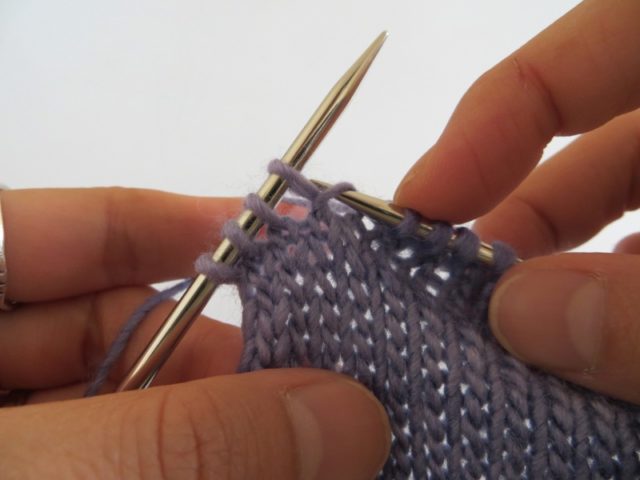
then into the stitch,
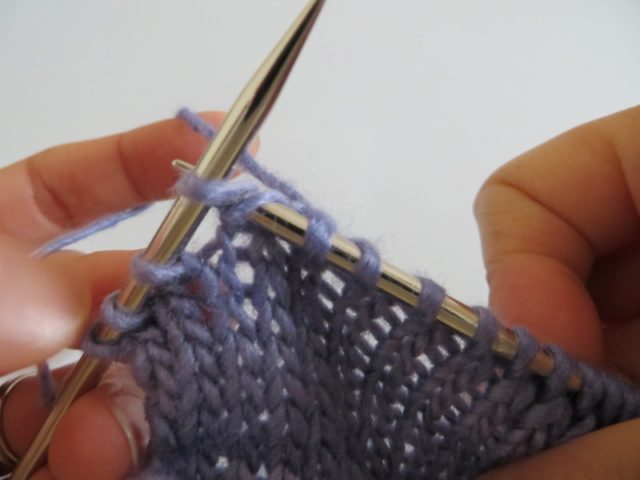
and knit them together (as if to k2tog).
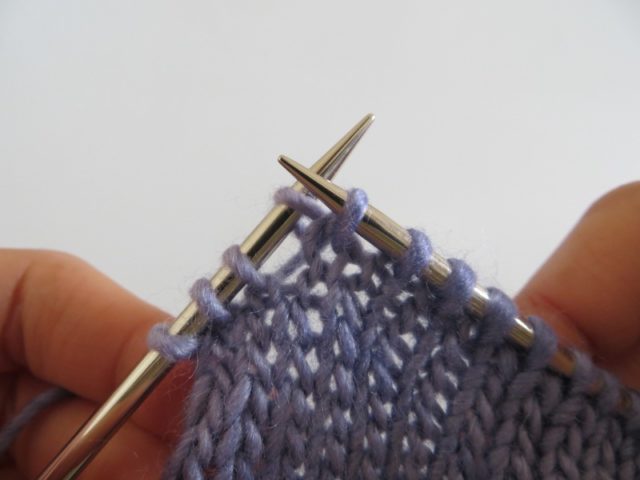
Here the wrap was knitted with the stitch and is hidden behind it.
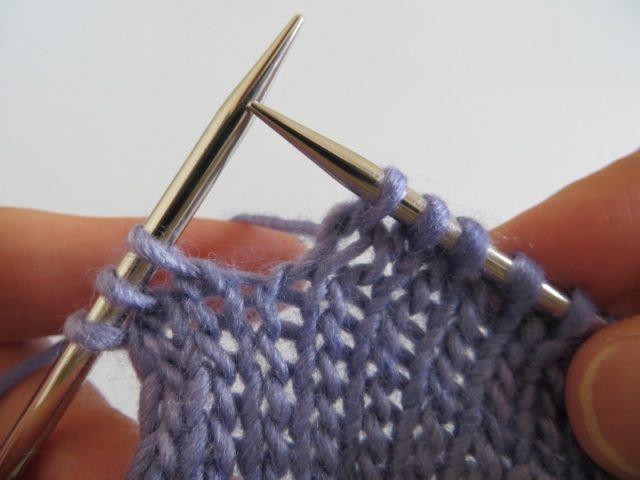
Knit to the end of row.
Here is the “resolved” wrapped stitch seen by the wrong side of work.
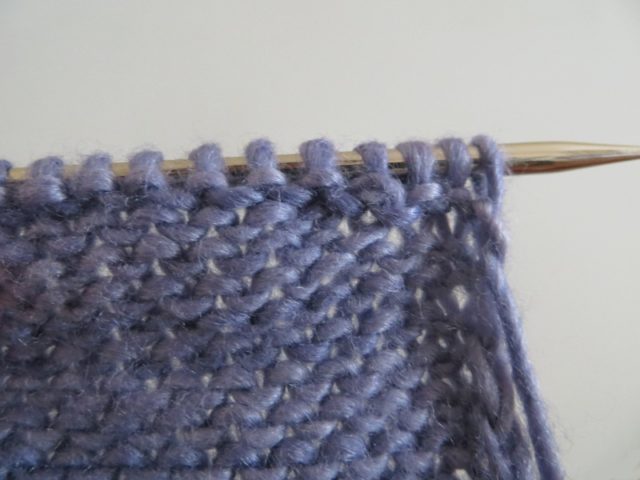
WRONG SIDE TO RIGHT SIDE
Next, we gonna look at how to make short rows on the other end of the work.
Purl until 4 stitches remain.
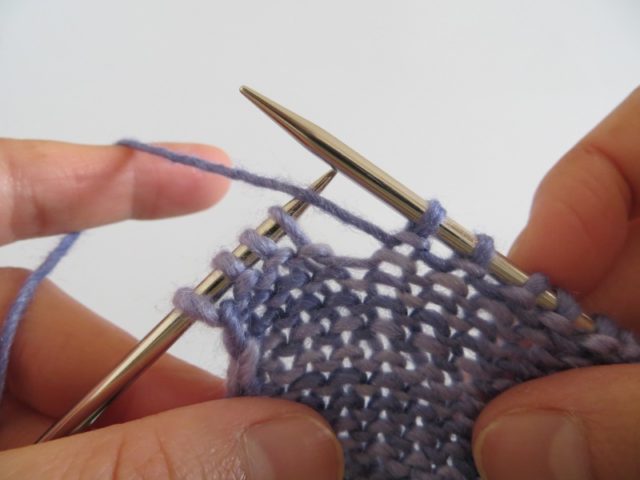
With your working yarn in the front of work, slip next stitch purlwise.
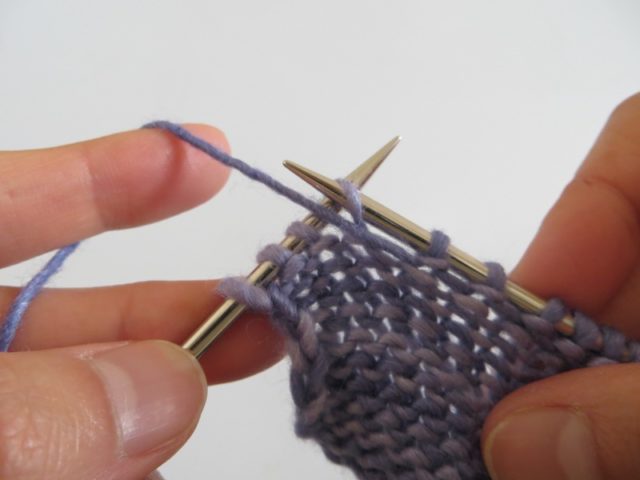
Bring the working yarn to the back of work.
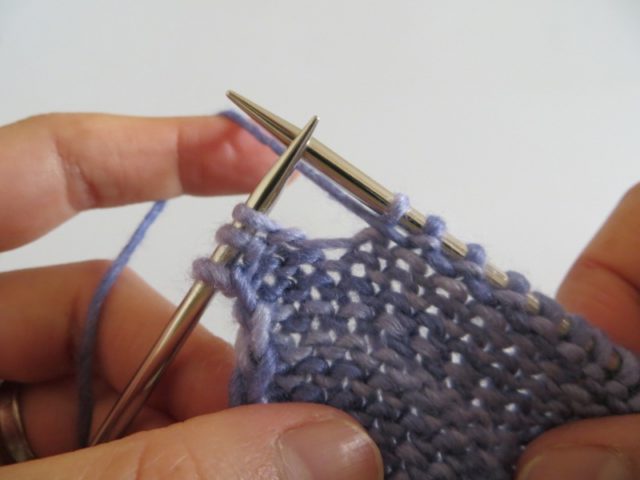
Then slip the stitch back to your left needle.
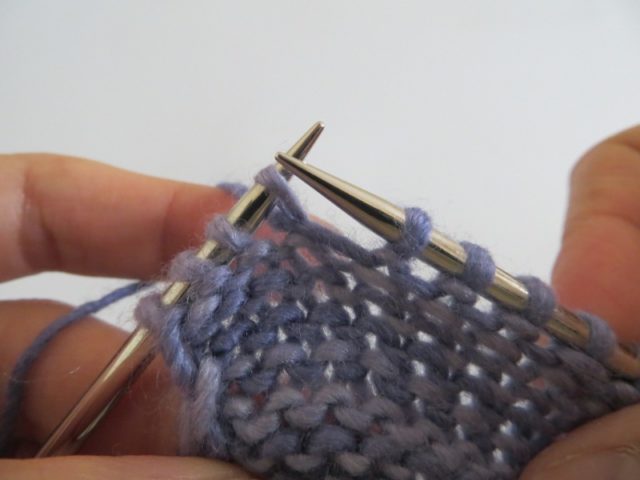
Turn your work to the right side.
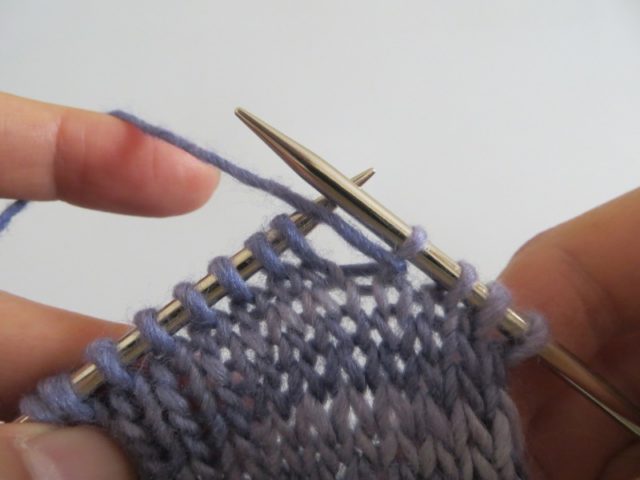
The working yarn is now in front of you. Bring it to the back to knit the row.
To “resolve” the gap at this end of the work, we should literally “pick up the wrap” to purl it with the stitch.
Purl to the stitch just before the wrapped stitch (usually indicated as “p(url) to wrapped st(itch)”).
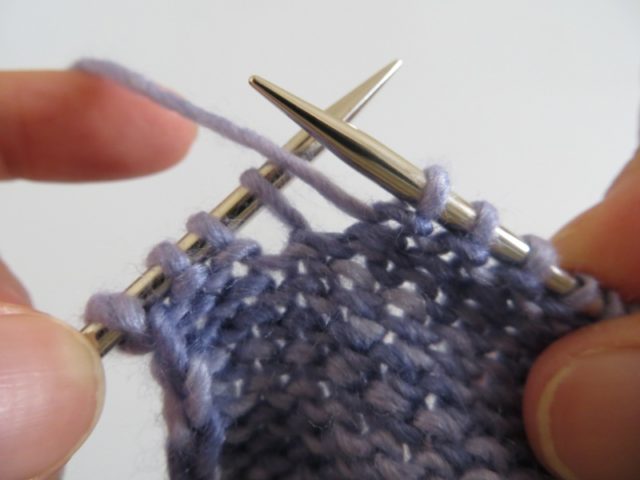
Then, in the back of the work, insert your right needle into the wrap from the bottom,
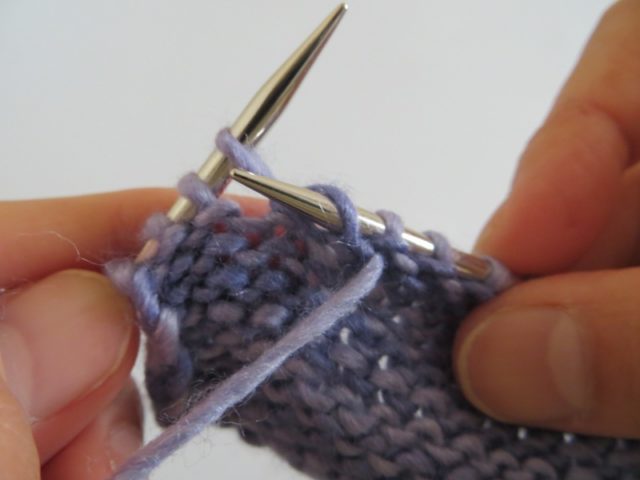
and lift it to your left needle.
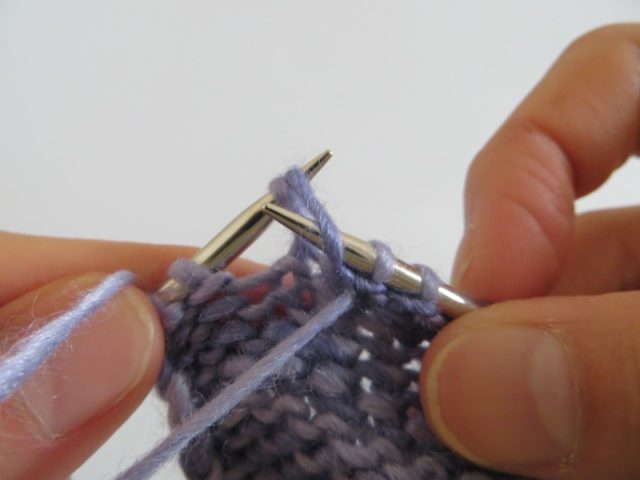
Purl this picked up loop with the stitch together (as if to p2tog).
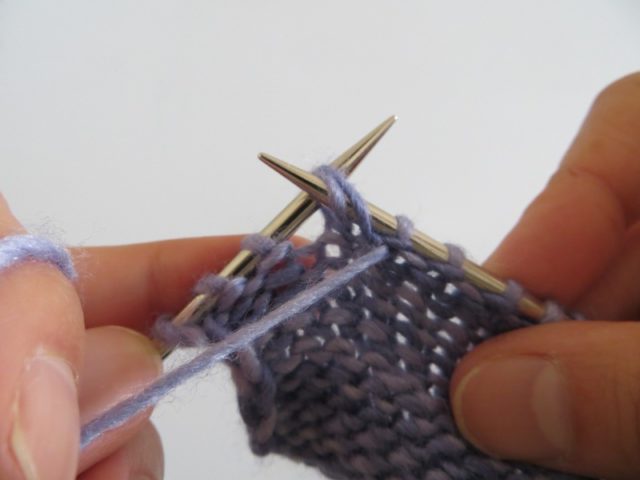
The wrap is now behind the stitch and invisible from the right side of work!
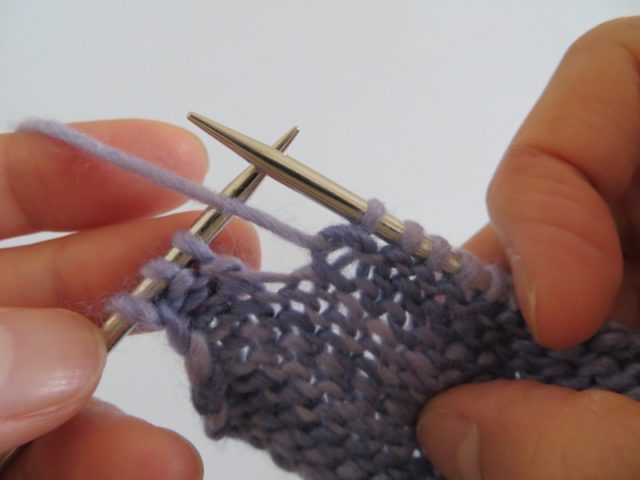
From design point of view, wrap and turn short rows are useful for garter stitch fabric. Wraps around stitches blend well into the “purl bumps” ocean of garter stitch and are not noticeable. For Stockinette fabric, there are better short rows methods, but wrap and turn can be useful in some situations.
As I explained above, W&T short rows produce 2-row differences at each turn. And after picking up wraps, you are going to obtain this:
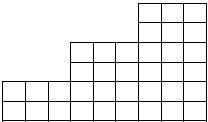
If your fabric doesn’t look as stairsteps after the picking-up row, this is because the knit fabric is forgiving.
And these gaps are not as smoother as Japanese or German short rows (please read this post), but they fill up the fabric.
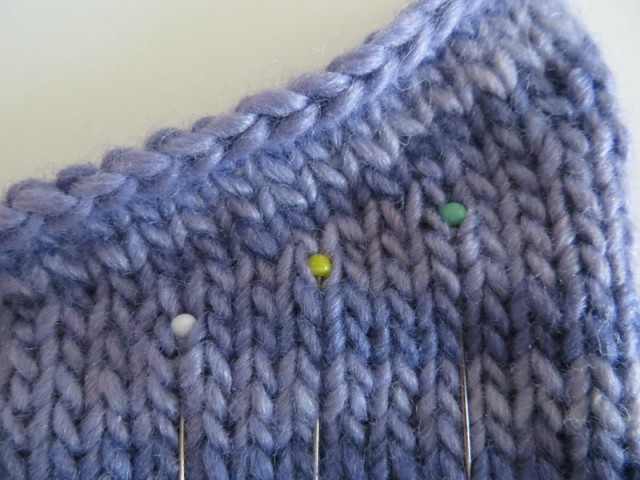
The pinned stitches are the turning stitches, and the darker blue row is the resolving row. You can see that there is only 1 row between turning row and resolving row for the left and center pins, while you can count 2 rows for the right pin, where I used W&T. The gap is more visible than two other methods but you can see the two stitches – smaller than others – fill up and create a denser fabric. This can be useful in top-down sleeve cap shaping where you want to fill the space between picked up stitches, or in sock heel shaping where you want heel turns to be less noticeable.
On this sleeve cap, I used wrap and turn method as well as double wrap and turn – wrap the same stitch twice – yes, that can happen.

The bottom line is, use the method which is adapted best to what you’re knitting!
Do you find this post helpful? Please consider supporting me if you want to read more helpful posts. Thank you 💜
![]()

One thought on “Classical Wrap and Turn”