
If you are a keen observer, you may have noticed that the ribbing edges of store-bought garments are different from your handknit sweaters’. Indeed, you can know whether a garment was hand-knit or not, just by seeing the ribbing edges!
The tubular cast-on and its bind-off counterpart produce that ribbing edge of store-bought garments and give your handknits a neat, professional look. If it amuses you to pretend as if your handknits are not hand-knit, this cast-on is for you 😁
In this post, I introduce you a long-tail method, called Italian (I don’t know why), which means you need just your working yarn and needles (unlike a provisional cast-on) and to keep a tail long, just like a normal long-tail cast-on.
The first step is keep a tail long enough, at least 3 times the width of what you are going to make (here I’m going to make a little swatch). Then, hold the yarn in your left hand, the yarn coming from the ball on your index and the tail on your thumb.

Grab your needle and just place it on the yarn between the thumb and index. This is the initial position. I’ll use this expression in the following explanations and that means your needle is between your thumb and index.

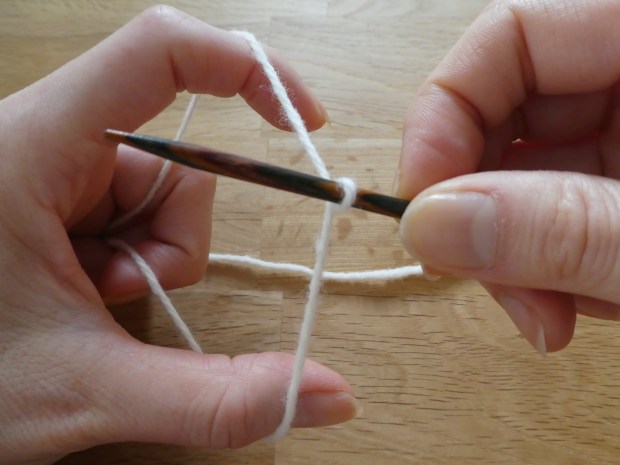
Push the needle downward and toward your thumb, then drawing a circle toward you as you do with your spoon, return the needle to the initial position.


You have a loop, the first stitch on your needle!
This first stitch is a knit stitch. It is not complete and needs a special treatment but we will talk about it later.
Now, we are going to make a purl stitch, because we can’t make several knit or purl stitches in a row with this cast-on and need to cast on alternately a knit stitch and a purl stitch.
With the first stitch on your needle, we are in a slingshot position (but not the same as with the classic long-tail CO).
Move your needle upward and go beyond the index’s yarn, then downward until you go past the yarn on the thumb.


Now, move your needle to the front of the thumb’s yarn then upward to the initial position. You can see the thumb’s yarn is cached on your needle.

Then, go behind the index’s yarn. Now you have the second stitch on your needle and the index yarn will become a bump you find on purl stitches.

This is the purl stitch of the Italian tubular cast-on.
To make a “complete” knit stitch, you need to do the opposite.
Move your needle downwards in front of the thumb’s yarn, then go behind it.

Move the needle upward to the initial position, then catch the index’s yarn from front and move your needle downward behind the thumb’s yarn.


When you go past the thumb’s yarn, lift up the needle tip in front of the thumb’s yarn to come back to the initial position.

You have a knit stitch on your needle. It doesn’t have the bump at the base, unlike the purl stitch.

Then you need to repeat those steps until you have cast on a required number of stitches.
For a project worked flat, you are certainly told to end with a knit stitch, and for a project worked in the round, you will end with a purl stitch.
In any case, when you finished casting on stitches, TIE A KNOT to secure the last stitch.
All these explanations sound tiresome? I uploaded a tutorial video – my first-ever tutorial video!
You can see how to move your needle with this.
I’ll write other posts on this cast-on because there are still lots of things to talk about. Stay tuned!
One thought on “Italian Tubular Cast-on 1”